Introduction
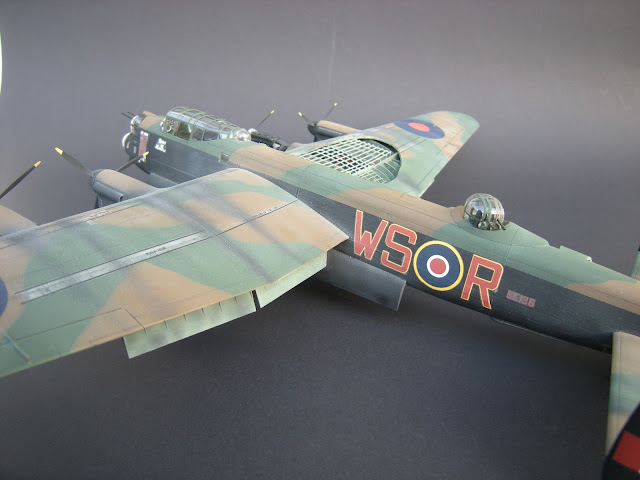
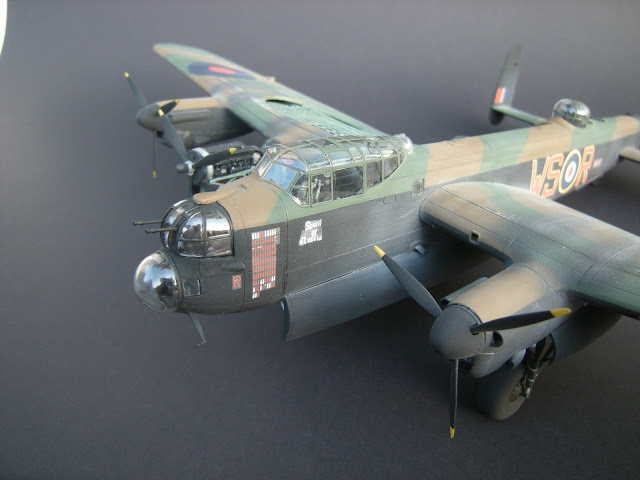
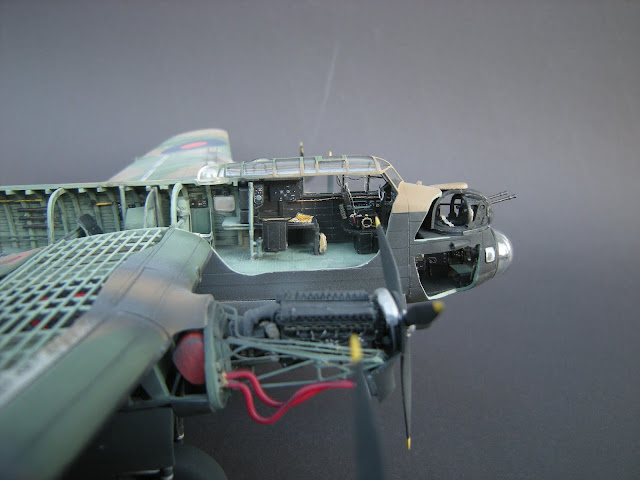
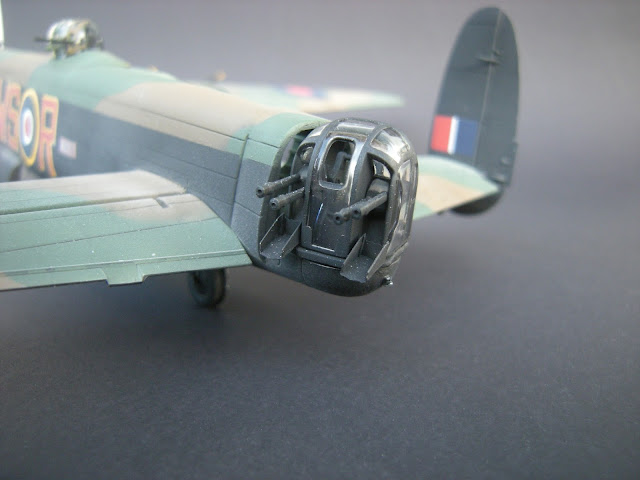
Lancaster BIII EE136 (WS-R) was one of the 100+ sortie aircraft of RAF Bomber Command during 1943-44. It served with IX Squadron at RAF Bardney in Lincolnshire when my Grandfather Fred Crossman flew on it as a mid-upper turret gunner. EE136 was named "Spirit of Russia" by a previous crew and eventually flew 109 bombing sorties with IX and 187 Sqn. My father sent me the brand new mold Airfix 1/72 Lancaster BI (FE)/ BIII kit as a surprise one day in 2014. I had been putting the build off due to the amount of detail and time in the kit. After seeing the great interior detail in the kit I decided it would be a shame to spend so much work on it, only to seal the fuselage together. So I took the crazy step of deciding to build a complete cutaway interior model and scratch build the entire thing.
OVERVIEW OF THE BUILD
The new Airfix (A08013) kit is one of their new molds and excellent in all aspects. Overall the fit was good with the exception of under the bomb aimer's compartment (although that was likely because it had cut it all apart). The 236 plastic parts were in a medium grey hard polystyrene with virtually no flashing to be seen. Panel lines and other details were crisp and accurate and the clear parts were thin, nicely transparent and fit very well.
The new Airfix (A08013) kit is one of their new molds and excellent in all aspects. Overall the fit was good with the exception of under the bomb aimer's compartment (although that was likely because it had cut it all apart). The 236 plastic parts were in a medium grey hard polystyrene with virtually no flashing to be seen. Panel lines and other details were crisp and accurate and the clear parts were thin, nicely transparent and fit very well.
Fuselage & Wings
The first step in the instructions was the creation of the 2 wing spars around the main fuselage floor. The parts were a good replica of the actual wing design and also served to add strength to the model wings, especially when holding the 40cm (17 inch) wingspan during building. Since the BIII does not have fuselage windows, I decided to fill and sand the whole area. In future I would more carefully mask off each panel line around the windows as I filled some of them making it hard to re-etch later. I used Tamiya putty which wasn't the best and required many re-applications due to tiny air pockets after sanding. I also filled and sanded much of the fuselage floor which had a fair few mold injection marks and a large mold sink area behind the rear spar (not normally seen in a regular build).
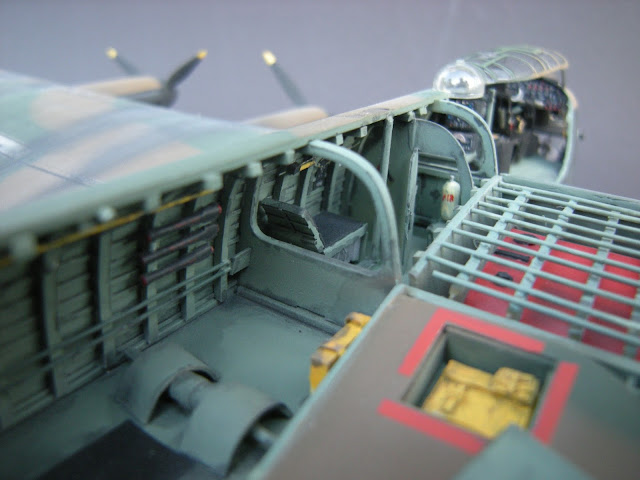
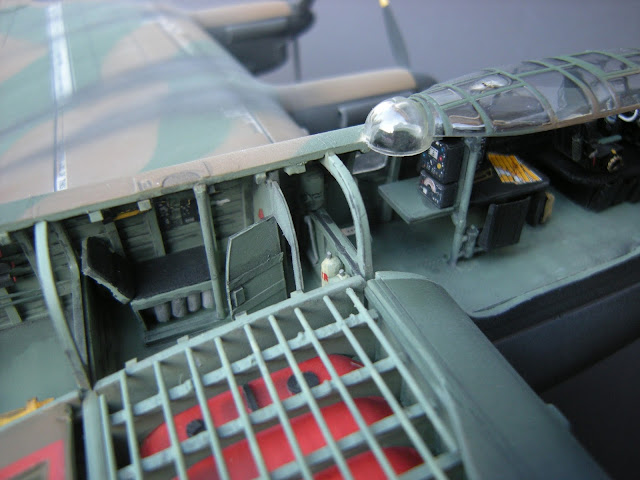
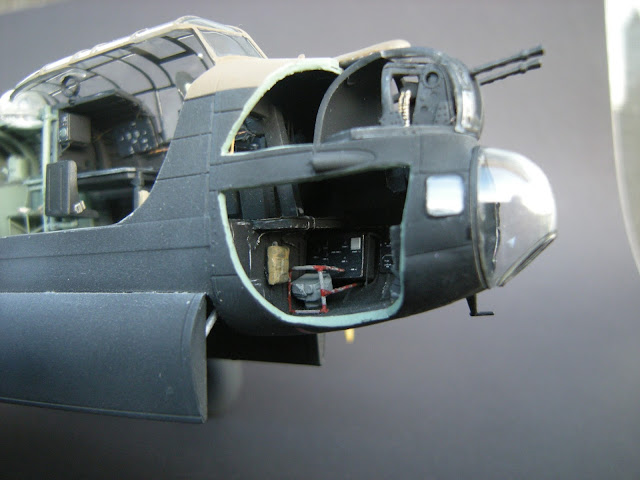
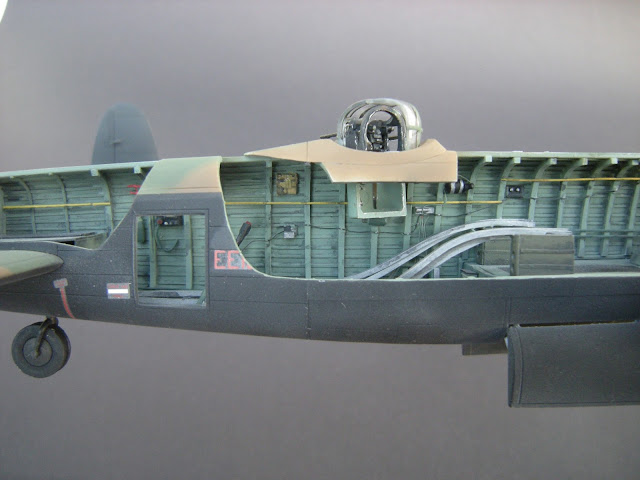
Finally I took a deep breath and started cutting away the starboard side fuselage to totally expose the interior. I used small electrical wire snips and cut is stages to avoid splitting the plastic (which it is easy to do). Once complete, I trimmed and sanded the edges to smooth lines. I took care to keep the fuselage sections which I would use later to mask the interior when painting the aircraft camouflage scheme.
The wings attach well
onto the spars will little requirement for filling gaps. I cutaway a section of
the starboard wing and scratch built 2 fuel tanks shaped from balsa wood and
covered in orange acrylic paint. Using sheet strip styrene I created the main
wing ribs and trailing edge ribs then covered them with 0.025 in styrene rod
for the stringers.
I cut out the section
for the dingy/ raf storage and used an old 1/35 Tamiya backpack as the package
and painted it yellow with a brown wash.
Interior & Cockpit
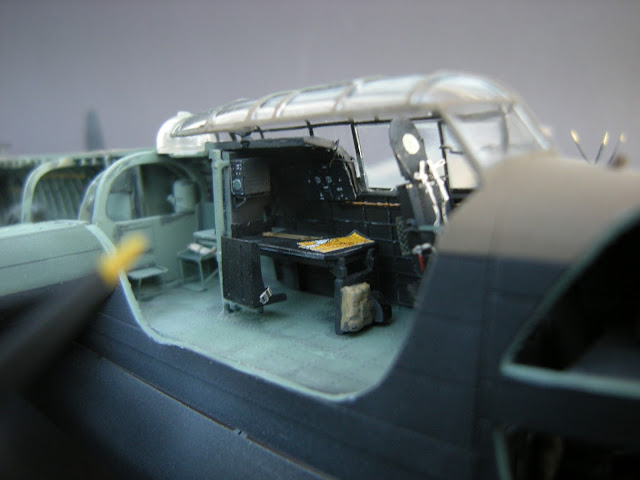
Once the fuselage was prepared and trimmed, I skipped the order of the instruction steps and started building up the interior. I first laid down all the stringers (these are the longitudinal strips that the aluminum aircraft skin is riveted to) using 0.020" (0.50mm) StripStyrene square strips. I lined them up with the stringers molded into the cockpit walls as a reference and continued the lines all the way back to the tail. I used Tamiya liquid cement to glue the styrene as it set in a few seconds and was very easy to work with.
Once all the stringers were placed, I used a larger StripStyrene (I forget the size) rectangular rods as the vertical formers for the fuselage structure, again using the same Tamiya liquid cement. I decide not to try and drill out the holes in each former which can be done.
I added the rear fuselage deck using sheet styrene and scratch built the step over the bomb bay.
Next I built up the tail section interior and tail gunner access area using thin StripStyrene sheet to create the box over the tailplane join, gunner compartment doors and slide.
Using the same sheet, I created the armoured door behind the main spar and built up the rest bunk, hydraulic reservoir and compressed air bottles using sprue parts and scraps from other kits.
I scratch built the flare chute using sheet styrene glued together then trimmed and sanded, then added detail parts from styrene rod and thin copper wire attached with CA glue. Old 1/35 scale german stick grenades were re-purposed to make the photo flash cylinders later painted black.
The Elsan chemical toilet at the rear was made from round sprue and sheet styrene.
Finally once all the main structure was installed, I used various sprue parts, old 1/72 control panel parts, strip styrene and copper wire to create the fine detail of first aid boxes, turret hydraulic actuators, fire extinguishers and so on. I used CA glue to hold the copper wire in place on each former, then once set, bent the wire carefully and added more CA until the process was finished. This prevented a pre-bent wire from popping off the fuselage while trying to glue the whole thing. Stretched clear sprue was used to make the crew handrails and the boarding ladder.
Tail turret ammunition cans and delivery tracks were fabricated from sheet styrene and strip rectangle.
Cockpit & Bomb Aimer
I decided to use the
Eduard interior set for the build since it would be open for all to see. The
pilot seat while hard to bend each part and glue, is worth it in the end. I
used the navigator and radio operator seat, step over the main spar, radio
panels and boxes, bomb aimer seat and panels as well as the seat belts. The
main control panel PE parts are worth using and the very fiddly throttle levels
are worth the patience.
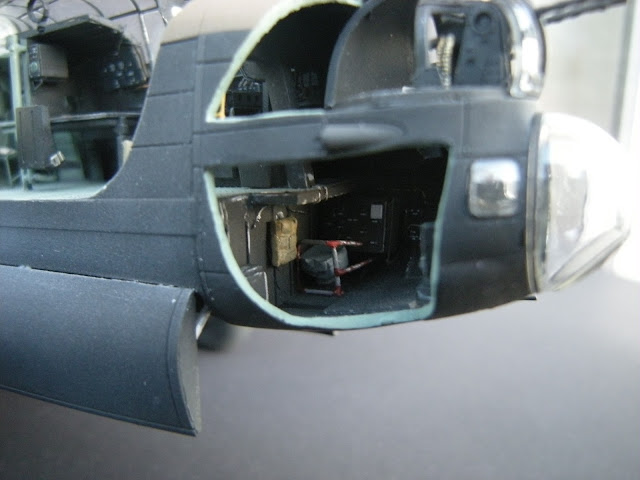
I made up an F24 camera
and protective frame for the bomb aimer's compartment and added alot of cables
and wires.
Undercarriage
The undercarriage on the
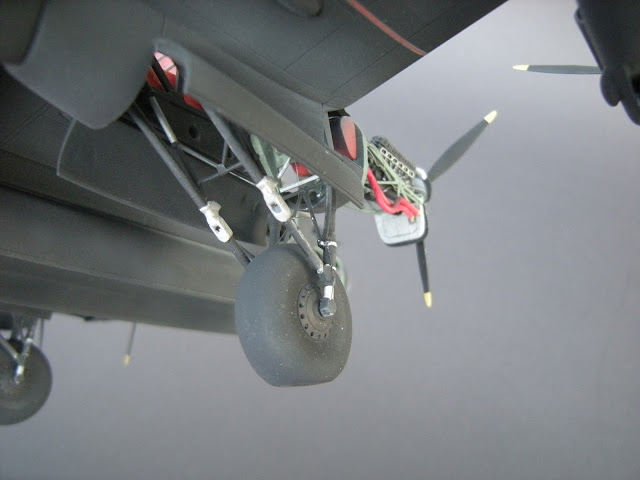
Lancaster are large and the Airfix kit has recreated them well. They are highly
detailed and the wheel wells are well detailed. Out of the box work on this
section.
Engine
Instead of scratch
building a 1/72 scale Merline 22 engine I decided to buy an Aries resin cast
engine which came is super detail. I used Humbrol enamel gun metal paint which
dries with a metallic sheen and hand painted rather than airbrushing.
Using 0.025 styrene rod
I built up the engine support frame and attached it to the engine firewall that
I had previously made (the scratch built orange oil tank can be seen behind it)
and added the coolant hoses to the radiator made from red electronics wire
(leave the copper wire inside which makes it easier to bend and keep its shape)
as well as various other wires and cables. All wires were glued with CA glue.
Painting & finishing
The interior was masked
and sprayed with RAF interior green (testors) then the detailed and long task
on painting each interior component. The whole interior was airbrushed with
future and a wash of black/ brown enamel (thinned 9:1) applied to the formers
and decking.
The glass parts (except
turrets and nose glazing) were added and masked using the Eduard canopy mask
set (I wasn't prepared to do all this work and mess up the clear parts!)
The left over fuselage
sections that were previously cutout, were taped back into place to mask the
interior from painting.
I didn't bother to
pre-shade (I prefer to shade the panel lines with thinned paint after the gloss
coat) and sprayed the matt black under side then masked everything and
airbrushed the green (Humbrol enamel No 30) and brown (No 29) using paper masks
cutout from an enlarged copy of the Airfix instruction sheet.
Decals were a mix of the
Airfix kit and XtraDecal for the IX Sqn Lancaster BIII WS-R which were rather
thick and took alot of microsol to bed down. My gloss coat wasn't enough and as
a result some of the decal edging can be seen on the nose art which is a shame
given all the work.
Conclusion
Overall a great new
Airfix kit (even if you are not doing a crazy cutaway model) and worth the
money. Apart from the pilot seat, its not worth doing alot of detail inside if
you are going to close up the fuselage since no-one will see your great work.
Recommendation for doing a cutaway model - alot of patience. This kit took 2
months work at 2-4 hours per day and another month on weekends to finish.
Materials/tools used
Kit:
1/72 scale Airfix Lancaster BI(FE)/BIII kit # A08013
Paint: Testors enamels
quality colour images, drawings and text. I also
managed to get a look inside a
fully restored BX (Canadian version of the BIII) and
took plenty of pictures.


