Halifax LV858 (ZA-J)
Halifax ZA-J of 10 Sqn RAF took off from Melbourne on the night and morning of 10/11 April to attack the rail yards at Tergnier, France. 4 minutes before reaching the target, the aircraft was attacked by a Bf 110 G-4 piloted by Hptm. Kurt Fladrich of 9/.NJG 4 based at Juvincourt. The aircraft crashed 1-2 km south of Berzy-le-Sec at 00:04h with the loss of pilot (F/Lt Barnes DFC) and rear gunner (Sgt Howell).
The route of LV858
My great uncle (Sgt Tommy Crossman, 2nd pilot) and 5 other crew baled out before the bomber crashed. Tommy was wounded and taken POW along with one other NCO. 3 aircrew evaded capture and returned to England. This diorama is inspired by the experiences of my great uncle Tommy.
Materials/tools used
Kits: 1/72 scale Airfix Halifax BIII kit (A06008A)
Italeri 1/72 scale Bf 110 G4-S3 (Italeri No 039)
Italeri 1/72 scale Bf 110 G4-S3 (Italeri No 039)
Paint: Tamiya acrylic spray cans and Testors enamels, Future polish, Alclad Matt Coat.
Decals: Kit supplied and XtraDecal
Diorama Base: 2cm MDF wood with photopaper printed scene (with woodland scenics turf)
Background: Handpainted acrylic cloud scene on 2mm matt art board
Process
1. Build and painted the model with electronics installed in halifax and Bf 110
2. Attach support rods during wing assembly
3. Build diorama base
4. Aircraft painting
5. Build, paint and attach fire effect to Halifax.
6. Attached aircraft to diorama base
7. Attach Bf 1110 tracer fibre optics to Halifax wing and test
8. Attach diorama background to base
I used the old and well complained about 1/72 scale Airfix Halifax BIII kit (A06008A). The kit has the usual raised panel lines and surface rivets and the fuselage and cockpit glass are left with many gaps that required filling.
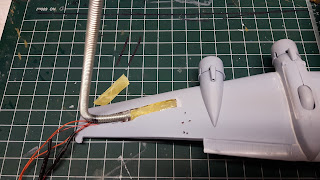
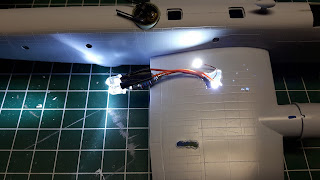
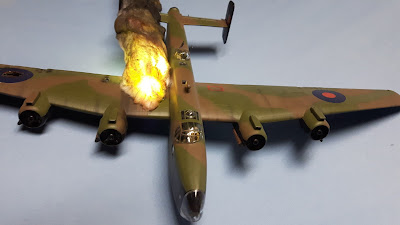
I started with installing the electronics in the starboard wing to represent the fuel fire that led to the separation of the wing of LV858 . I used two 9V 5mm white LED with resistors, and two 9V flat surface mount chip LED. These were hot glued into position behind the starboard inner engine nacelle. The chip LEDs came from Jennifer Smith at Small Scale Lights (https://www.smallscalelights.co.uk/).
I used a length of threaded stainless steel bar (about 8mm) secured inside the starboard wing (tape and a lot of hot glue). This would support the aircraft in the diorama. The LED cables exit the wingtip and were taped to the rear of the support bar (out of sight). I could have used a hollow steel tube but I wanted a threaded end to be able to attach to the diorama base.
I added some damage holes in the wing from the nigh fighter attack.
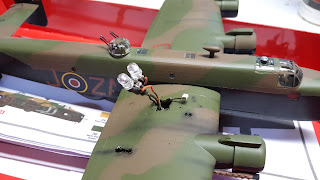
For a larger model I used Tamiya black, brown and green spray cans (gloss) to get a consistent colour rather than my tiny airbrush. Decals were a mix of the Airfix kit and Xtradecal red bomber letters. ZA-J was a brand new aircraft and had only completed 4 missions so very little weathering was used.
Bf 110 G-4 (3C+DT)
The Bf 110 G-4 piloted by Hptm. Fladrich was later destroyed on 18 April 1944 after he baled out after an engine fire.
I used the Italeri 1/72 scale kit (Italeri No 039). The kit is pretty good except that the engines attach to the nacelle with 0.5mm gaps that require filler. I found that the radar antennae are hard to attach straight and level and kept getting knocked off.
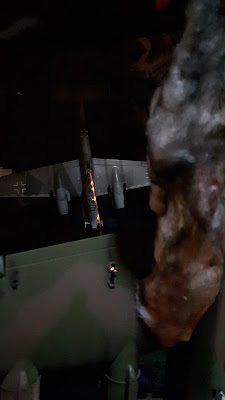
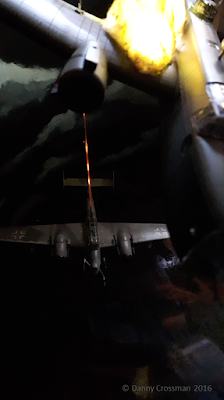
After assembling and painting the cockpit, I started with an orange 3V LED fibre optic bundle (again from Small Scale Lights). The bundle already has a resistor attached and the fibre bundle was about 15cm long. This was to represent the tracer fire from the Bf 110 Schrange Musik 20mm cannon firing up at the Halifax wing.
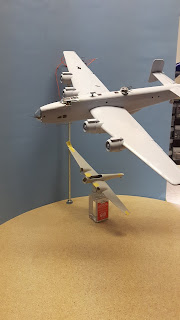
The fibre bundle was inserted through a 5mm brass tube (bent at 90 degrees) and glued into the starboard wing to support the aircraft. The fibres exited the cockpit floor and I made a mistake by positioning them behind the radio - the real Schrange Musik was at the rear of the cockpit! Oh well - too late.
No complicated wheels and undercarriage for this model!
I used a standard grey paint scheme upper with Hellblau and black 2-tone under side. I left the propellers off of the aircraft after much thought (to represent the spinning).
The other propeller options are:
a) Leave them on (then people think, looks good apart from the props are not moving!)
b) Make a clear plastic disc (looks like a ``clear plastic disc``) with painted prop blur
c) Make wire wool prop blades that appear blurred.
Diorama Setup
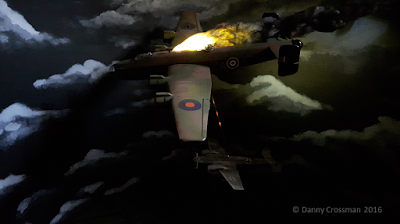
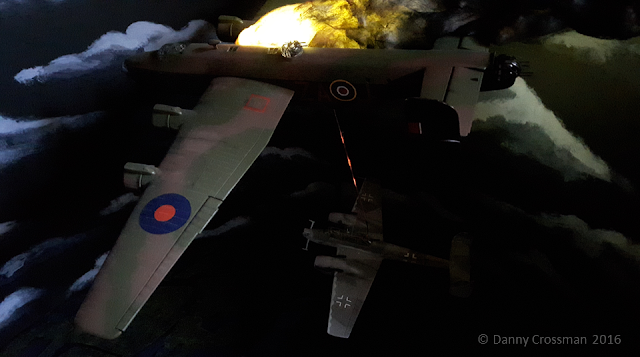
The aim of the diorama was to have the Bf 110 flying underneath the Halifax and shooting tracer rounds up at the wing.
The Diorama would then have these main components:
1. Diorama base
2. Background
3. Aircraft
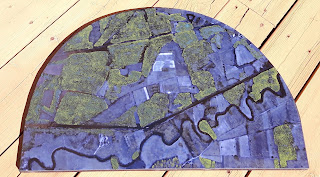
The diorama base was made from a sheet of 2cm MDF wood cut in a circle shape and drilled with 2 holes for the aircraft supports. I took a Google Earth screen grab at 10,000 ft of the area where ZA-J was attacked in France and altered the colour to a night time dark blue and printed on photopaper at Staples.
Darkened diorama base
The Fuel Fire Effect
After getting advice from diorama explosion and fire expert Bjorn Jacobsen (http://www.dioramas-and-models.com/) I used the same chicken wire mesh covered with cotton wool. I used yellow celophane plastic under the mesh to tint the light amber/yellow and used black acrylic paint from my airbrush to colour the smoke.
Make sure to stiffen the cotton wool assembly with hairspray otherwise it will blow away when you airbrush! I didn't add any black to the start of the wool as this is the fire, and added small areas of yellow/ amber paint from the airbrush.
I secured the mesh assembly to the wing with invisible thread and used messy and very sticky contact cement to glue the edges of the wool to the aircraft so that it would not move or fall off.
With the 9V LEDs underneath, the effect is very realistic.
I originally used a high resolution sky and clouds image (darkened in photo editor) and printed on photopaper but the background reflected too much light. I resorted to painting my own night sky and clouds scene on matt bristol board (36 x 18 inches). The background is attached to the edge of the MDF base using wood screws and flat washers to keep in curved. The electrical cables and battery holders are positioned on the rear of the diorama.
In daylight the effect is limited because the tracer fire from the Bf110 is hard to see. Instead I added a matt black cover (same shape as the diorama base) to the top to darken the scene and be able to take pictures and show the diorama off.
The Finished Diorama
All of the pictures are taken without any photoshop or editing (just using a Samsung S5 smartphone camera).
Tracer fire coming up through the wing
The end of Halifax LV858 and dedication of just one crew of the thousand in Bomber Command and the NachtJager


